
Citrix ShareFile User Guide
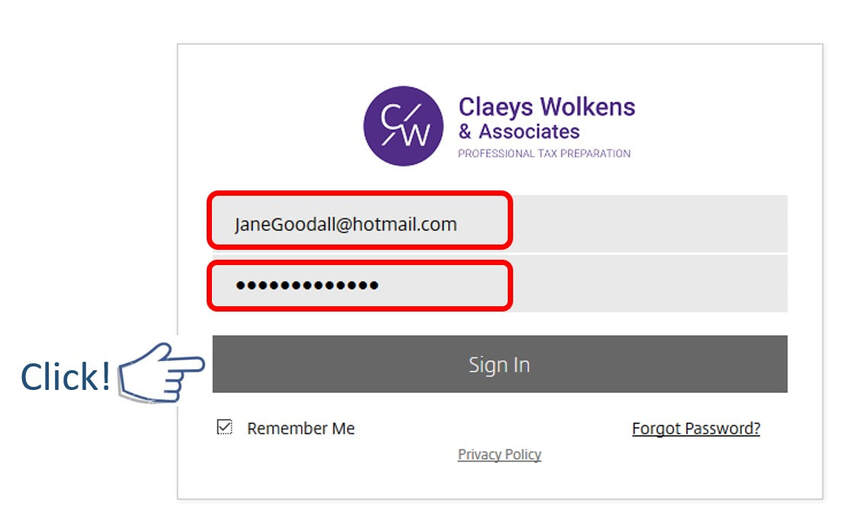
- Navigate to: https://cwatax.sharefile.com/Authentication/Login
- Type your email in the top box (in the example below, we're using [email protected])
- Enter your password in the lower box (if you have forgotten your password, click on "Forgot Password" in the lower right-hand corner of the screen.
- Click the gray Sign In bar as shown in the image below...
Upon successfully logging in, you will be presented with your ShareFile Portal Dashboard.
In the navigation pane on the left side of the screen, click Folders as shown in the image below. This will expand a sub-menu to view your own folder...
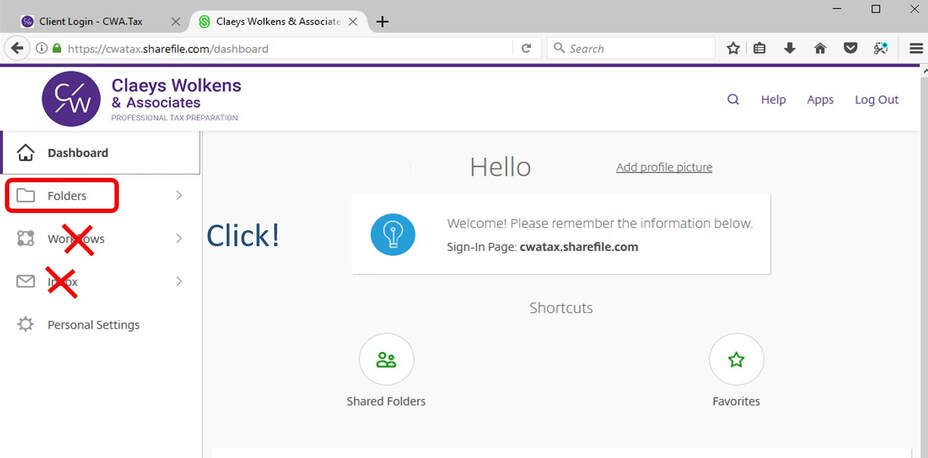
Note: The Workflows and Inbox features are not functional. You will not be using these.
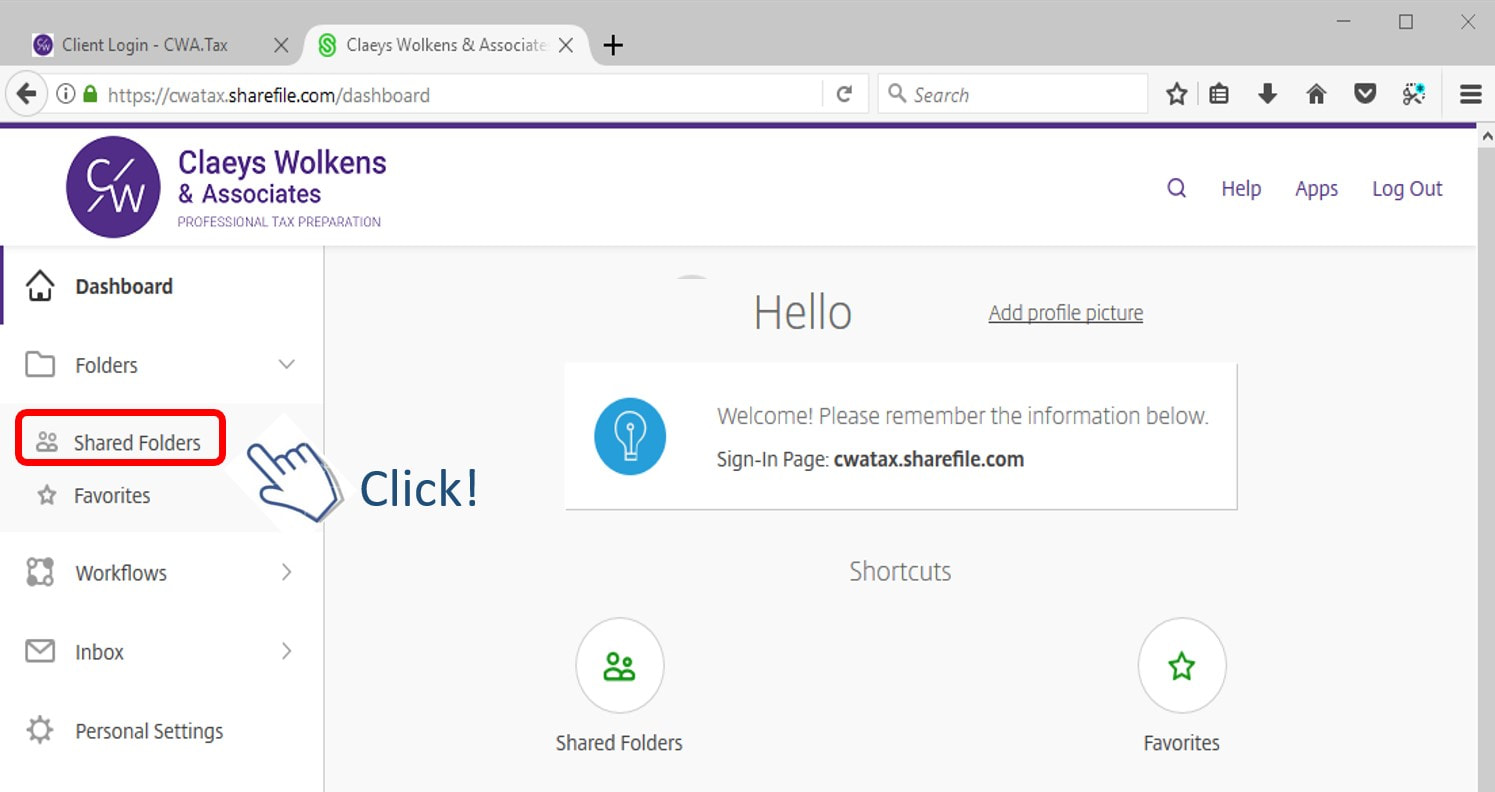
Next, in the navigation pane on the left side of the screen, click on Shared Folders as shown in the image below...
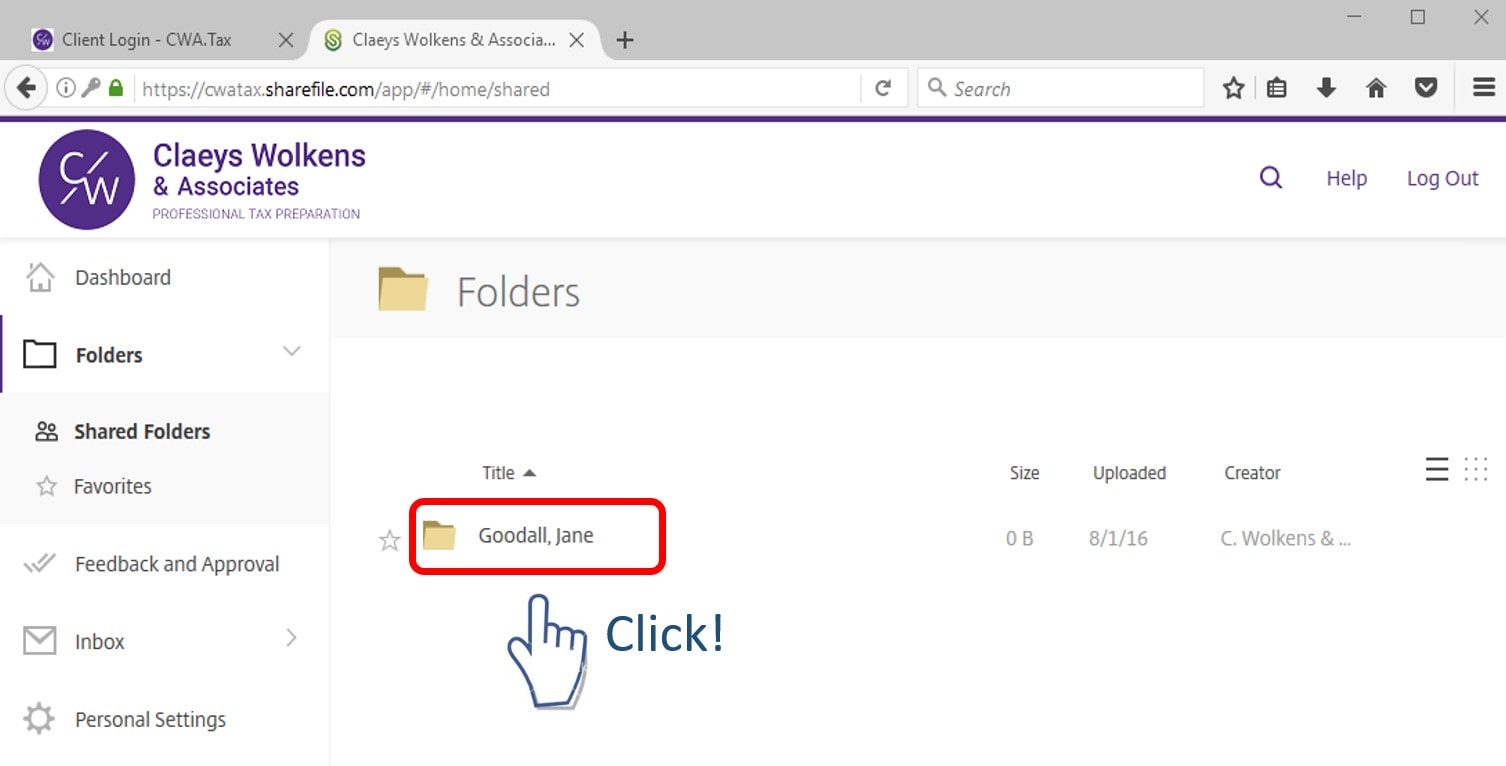
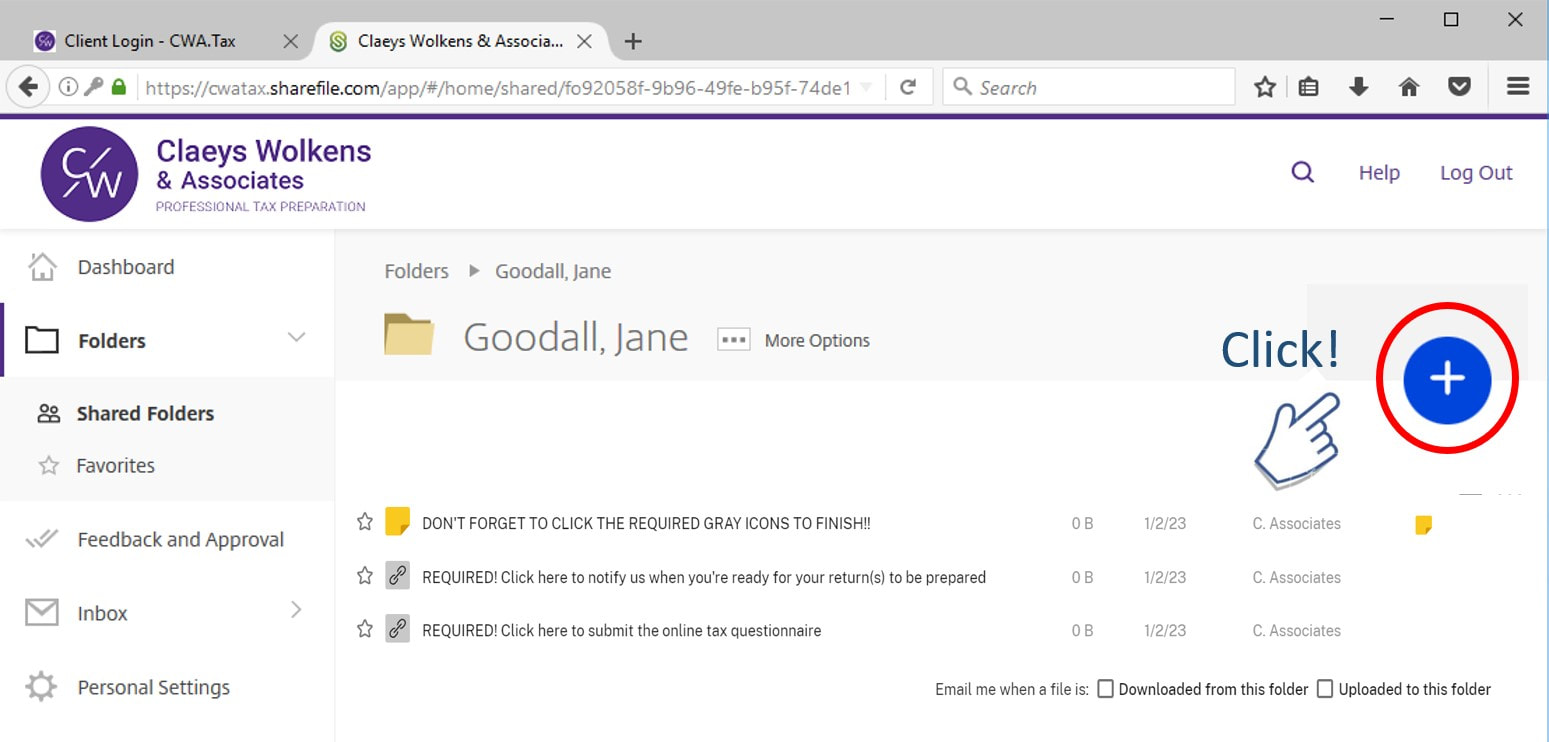
Next, Click on the folder that has your name on it. In the example below, the client's name is Jane Goodall.
The next screen is your Portal upload area. This is your private secure portal to upload documents.
To upload documents, click on the blue + button as shown circled in red in the screen below...
To upload documents, click on the blue + button as shown circled in red in the screen below...
Note: You may see a folder for the prior tax year; e.g., “2021 Tax Records.” This folder contains a copy of your prior year tax return(s).
After you click or tap on the green button, a list of options will appear as shown in the image below. While hovering over the dropdown menu, move your pointing device over to Upload and click on it...

Tip: It is not necessary to create folders! Instead, just upload the documents to the main screen in any white space shown.
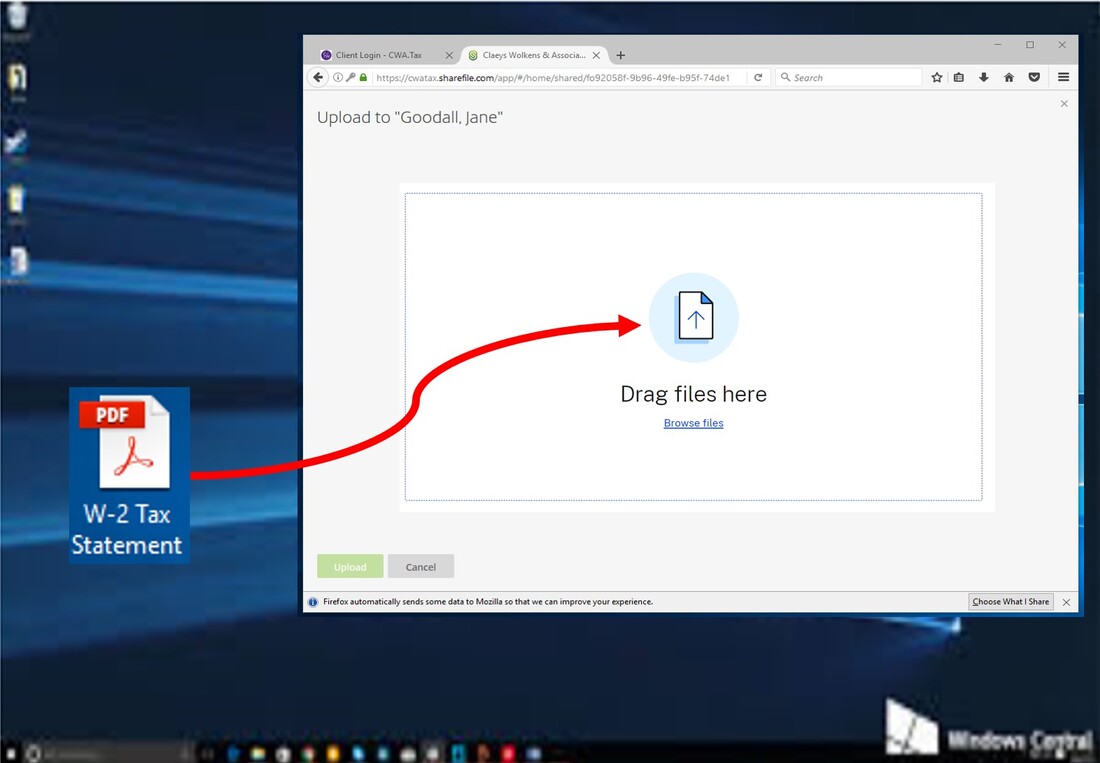
After you click on Upload, the following screen will be displayed. You have a choice of dragging files from your computer desktop onto the ShareFile window or selecting files. The first image below shows how to drag files.
Upload Method 1: Drag-n-Drop:
•On your computer, locate the desired document that you want to upload.
•Click and hold down your mouse button on the PDF document and then “drag” it onto the white area, and then release the mouse button.
Upload Method 1: Drag-n-Drop:
•On your computer, locate the desired document that you want to upload.
•Click and hold down your mouse button on the PDF document and then “drag” it onto the white area, and then release the mouse button.
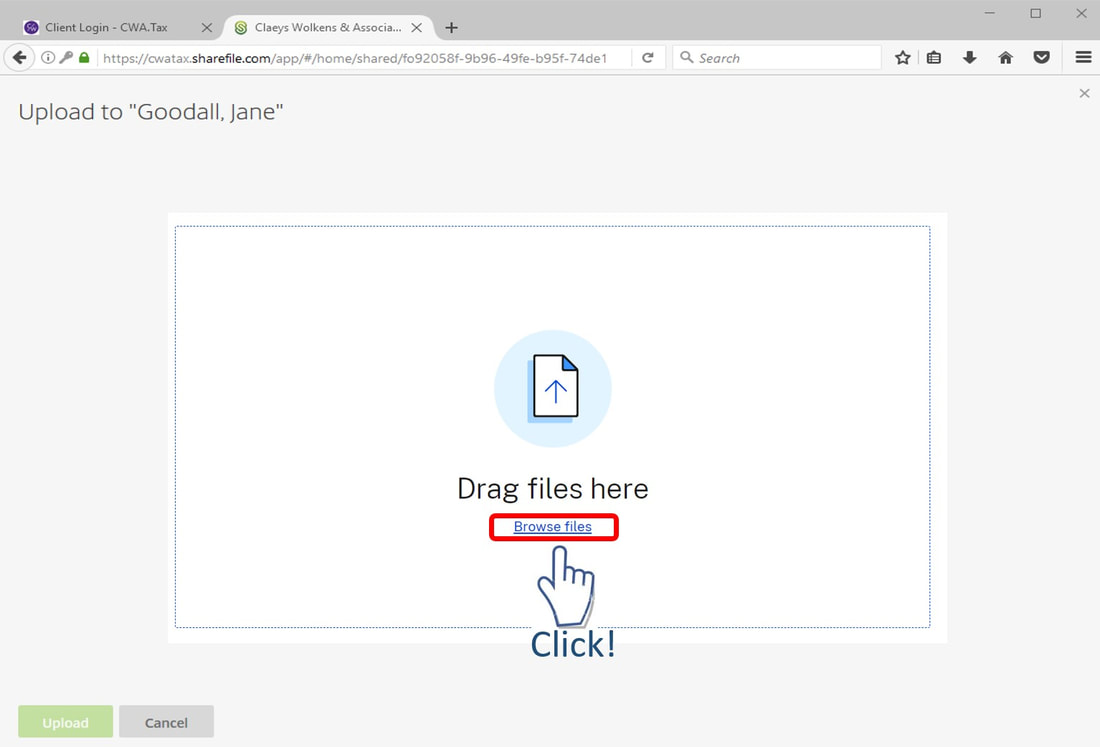
Upload Method 2: Browse for Files on your computer
•Click Browse Files as shown in the screen image below...
•Click Browse Files as shown in the screen image below...
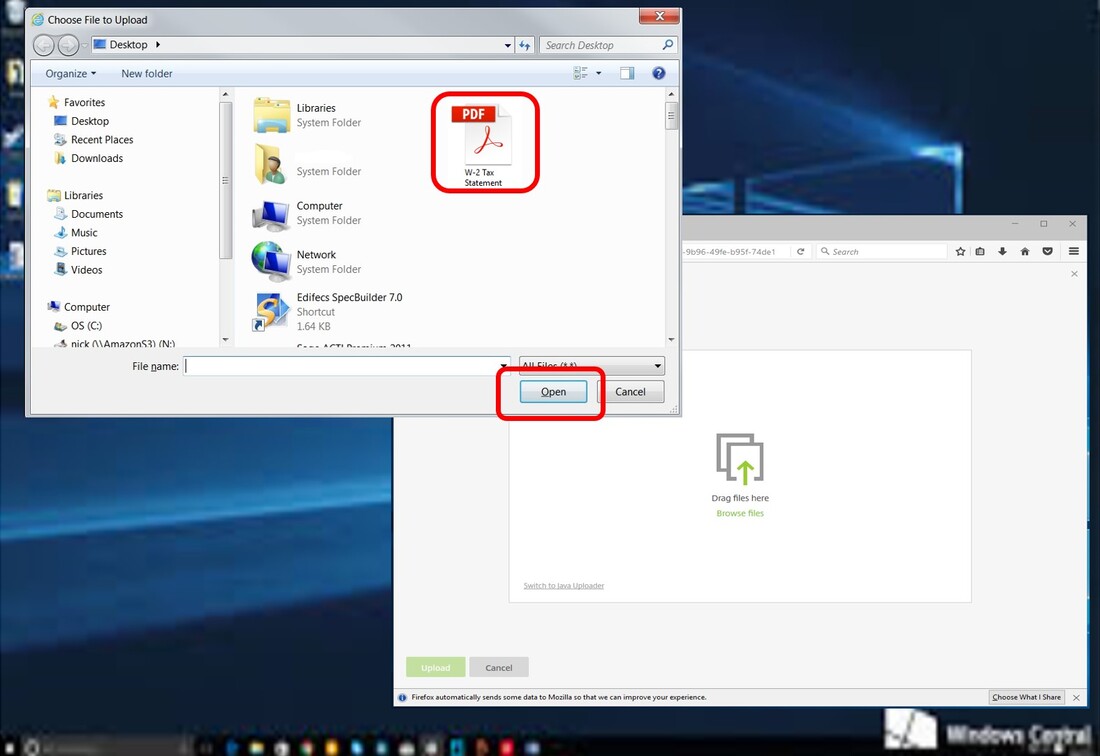
Upload Method 2, continued...
•A new window on your computer will pop open as shown below.
•Locate the document you want to upload and click on it. In the example below, a PDF document named “W-2 Tax Statement” is being uploaded.
•Click Open to upload the file (note: your operating system's button may be labeled Select instead of Open)
•Depending on your operating system, you may need to click the Upload button at the bottom of the screen after clicking on open.
Note: Your computer operating system and/or version may vary. The above is a general illustration of a Microsoft Windows desktop.
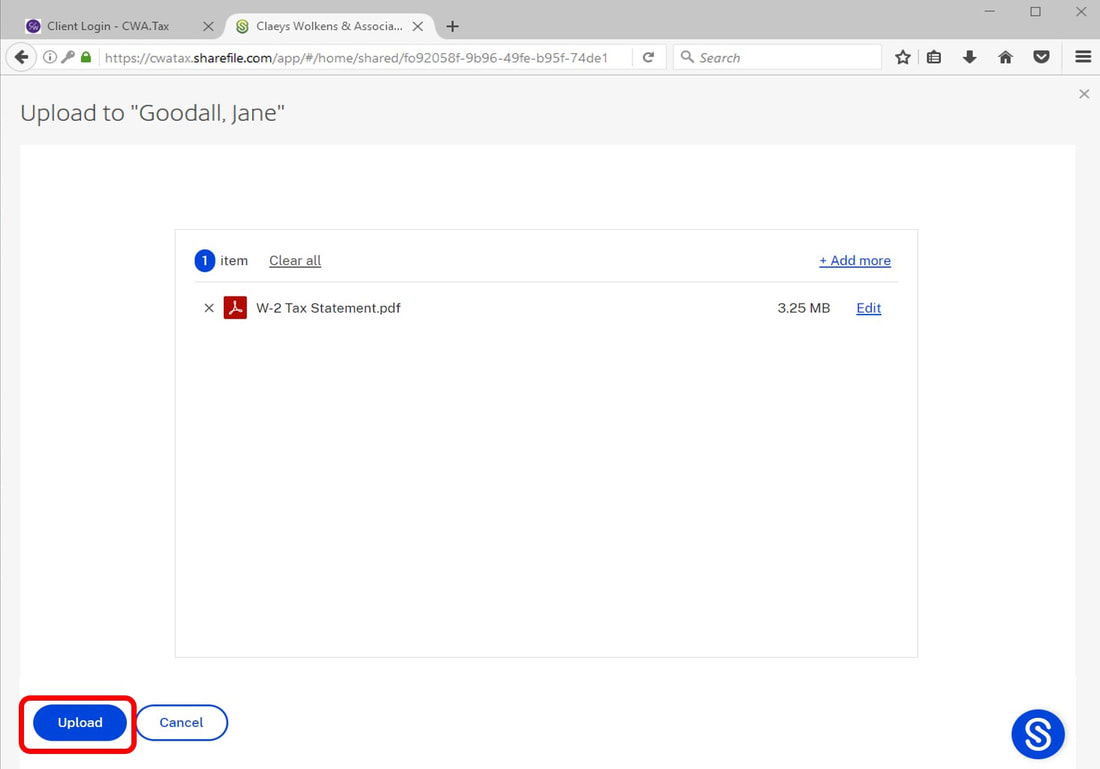
Finally, click Upload (after clicking on Open or Select in the previous step). See image below.
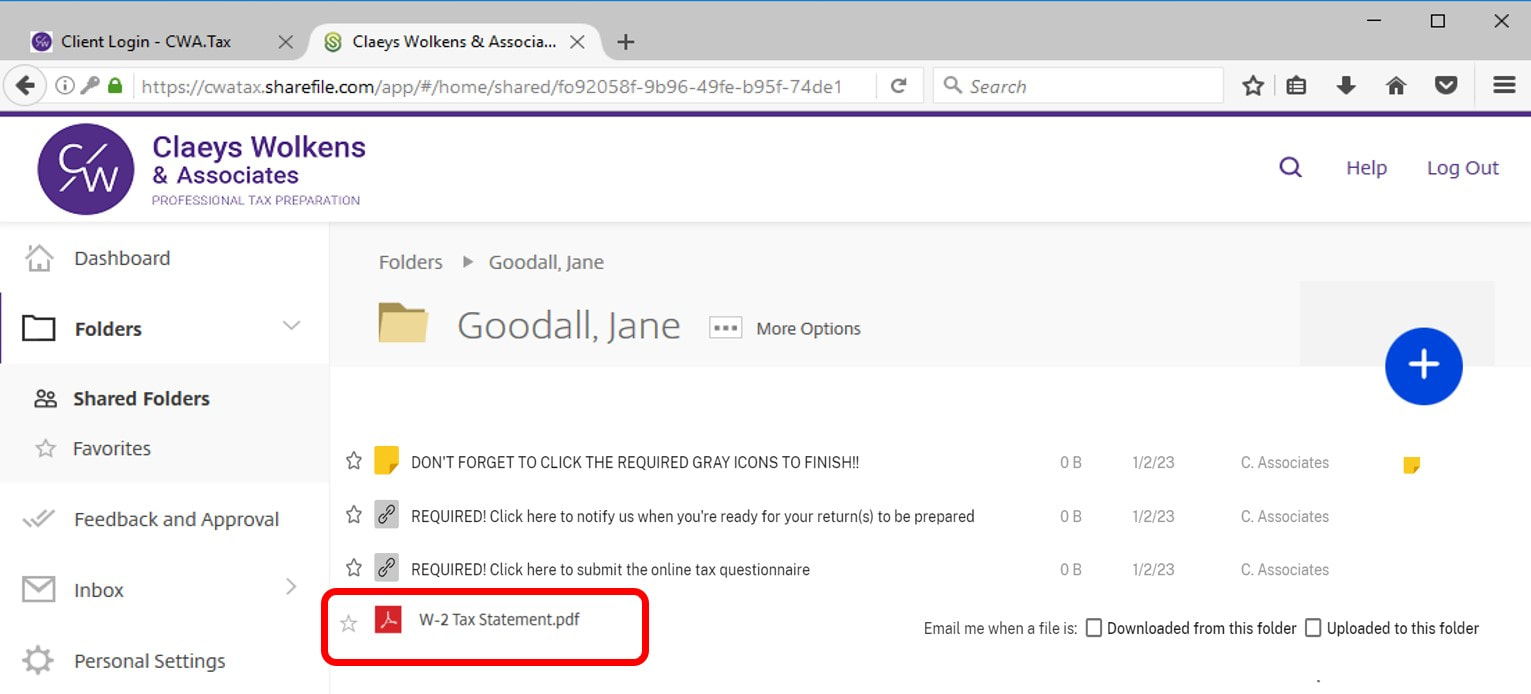
Upon successfully uploading, your document will be displayed in the window. In this example, the successfully uploaded W-2 Tax Statement is circled in red.
Note: If you do not see the document in your portal, it was not uploaded. Repeat the previous step.
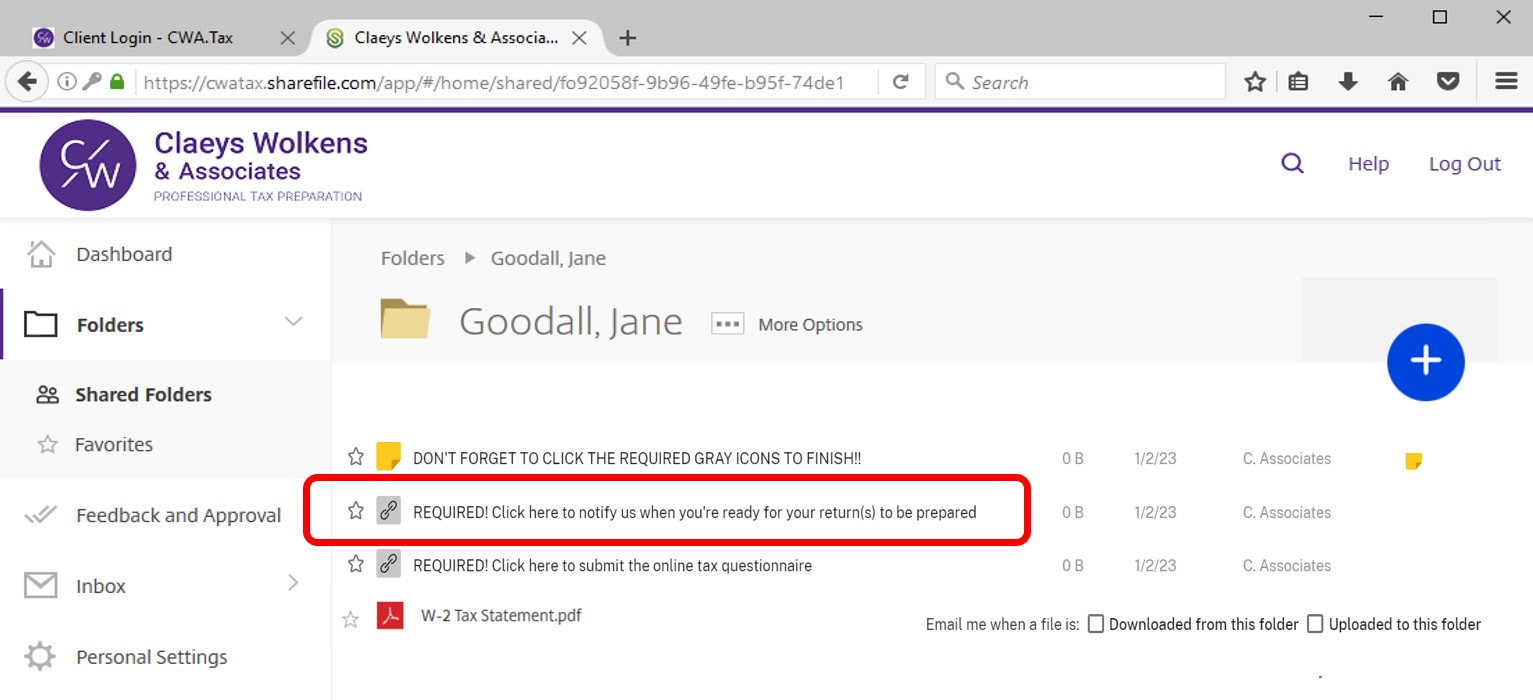
Once you are done uploading all your tax documents, click the gray button to notify us that you're ready! See circled red button in the screen image below.
Tips:
Don't hesitate to contact us if you have any questions.
- We can only process the following file types:
- PDFs
- MS Word
- MS Excel
- QuickBooks files
- Do NOT upload photography files, such as JPEG, JPG, TIF, etc. These files are not document files and we cannot process them due to pixelation.
- Your phone's native camera app will take photography files only.
- If you need to use your phone to snap a pic, please use a PDF Scanner application.
- Go to your phone's Apple Store (Apple App Store, Google Play, etc.) and search for "PDF Scanner."
- A PDF scanner app will allow you to use your phone's camera and will save the pics you take as a PDF file.
Don't hesitate to contact us if you have any questions.
